Every fall I get super excited about one thing. The arrival of pumpkins! Finding a fresh pumpkin in the grocery store is definitely a seasonal thing. You’re even hard pressed to find one after Halloween. It’s like the whole United States has forgotten that this orange round orb is actually a food source not just to look pretty on doorsteps or to butcher up and allow to rot.

And I’m sorry but pumpkin in a can? PLEASE?! It’s so easy to prepare and store fresh pumpkin on your own to use all year round. And it’s not just for pies and breads. And you can even cook and eat the oddly colored grotesquely shaped ones too.
Pumpkins, thought to have originated in North America, actually fall into the variety known as winter squash. Grown during the summer but harvested in the fall before the first frosts, pumpkins can be easily stored in cool dry place for up to 3 months or longer. (Check out this great site for more detailed storage information)
Pumpkins are one of the most popular crops grown in the United States by about 1.5 billion lbs. produced each year. I have to wonder how much of that amazing food supply goes to waste each year.
Raw pumpkin can be fed to livestock during the winter months to keep up their dietary needs as local vegetation goes dormant. It is especially beneficial to poultry as a food supplement for regular feed. Pumpkins help maintain egg production which can slack off or completely stop during the colder months.
OK, so maybe I have a big soapbox when it comes to pumpkins of all things. But I really hate to see this wonderful food source not being used to its full potential.
It’s so easy to put up your own pumpkin.
(This method can be used to cook any hard or winter squash)
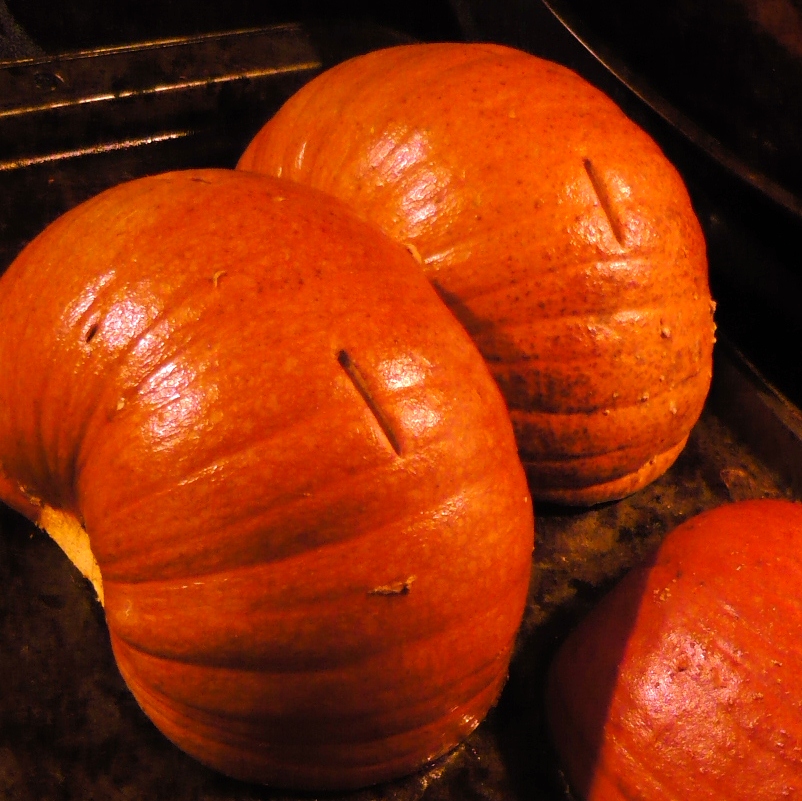
1. Slice the pumpkin in half (either vertical or horizontal, it makes no difference)
2. Remove the stem, seeds and fibrous insides. (I use a thin spoon and scrape a tiny layer of the meat out it makes for a nice clean inside) Feed to chickens (or wild birds) or toss them into the compost (or dry them for next year’s planting if you’re that ambitious) or roast and eat.

3. Rub olive oil on the inside and outside of the pumpkin halves
4. Place the halves inside down on a cookie sheet or in a baking dish.
5. Stab the shell with a knife a few times to create some venting holes.
6. Bake in a 300 degree oven until you can easily stick a knife through the skin and flesh. (If i want to store the pumpkin in cubes for stews I don’t cook it as long. If its going in pies and breads where you want it softer, let it cook till its very mussy)
7. Take it out of the oven once you have reach the desired texture and allow to cool. Once you can handle the pumpkin either slice it in to cubes and remove the shell (even though it’s fine to eat once it has been soften by cooking) or scrape the meat from the shell. (If you want it really smooth you can use and emulsion blender or food processor but I still like a little texture in my pies.)
I like to store it in freezer bags and usually measure out enough for one recipe for bag. That way I always thaw out the right amount. One good sized pie pumpkin can give you enough for two-three pies. AND if you do two pumpkins at once you get twice as much for about the same amount of time and effort.

Now since I do have kids and they have greatly out grown the ability to be appeased with the activity of painting their pumpkins, I do sacrifice 3 pumpkin souls to the order of the jack o’ lantern every year. And I feel completely guilty.
More Blog Articles From Arkansas Women Bloggers on our Fall Blogging Challenge.
I have been roasting my own pumpkin for years! I love it!
Great post – I didn't know how to use a pumpkin for anything but a decoration until now.
I've been wanting to find a pumpkin roasting tutorial, so I'm happy to have found this! I completely understand what you mean about being bugged by all that wasted food!